If you already have an HTML file, publishing it means putting it on a hosting platform so other people can open it through a public link. This guide explains how to publish a website with html, including what files you need, where to upload them, and the easiest ways to get your site live.
What it means to publish a website with HTML
What publishing an HTML website actually means
Publishing an HTML website means uploading your site files to a hosting platform so people can access them through a public URL. Instead of opening index.html on your own computer, visitors open your site through a live web address. For a simple static site, you usually only need the correct files and a hosting platform that can serve them online.
What files you need before you publish
Before you publish anything, make sure your website folder is complete and organized. This is where many beginners run into trouble. In real use, it is very common to upload index.html and forget the stylesheet, images, or JavaScript file that the page depends on.
A simple HTML website usually includes these parts:
• index.html • One or more CSS files • One or more JavaScript files if the page has interactions • Images, icons, or logos • Optional folders such as css, js, or images
The most important file is usually index.html. In many hosting platforms, this is the default file loaded when someone visits your homepage. If your main page is named something else, the site may not open correctly unless you configure it manually.
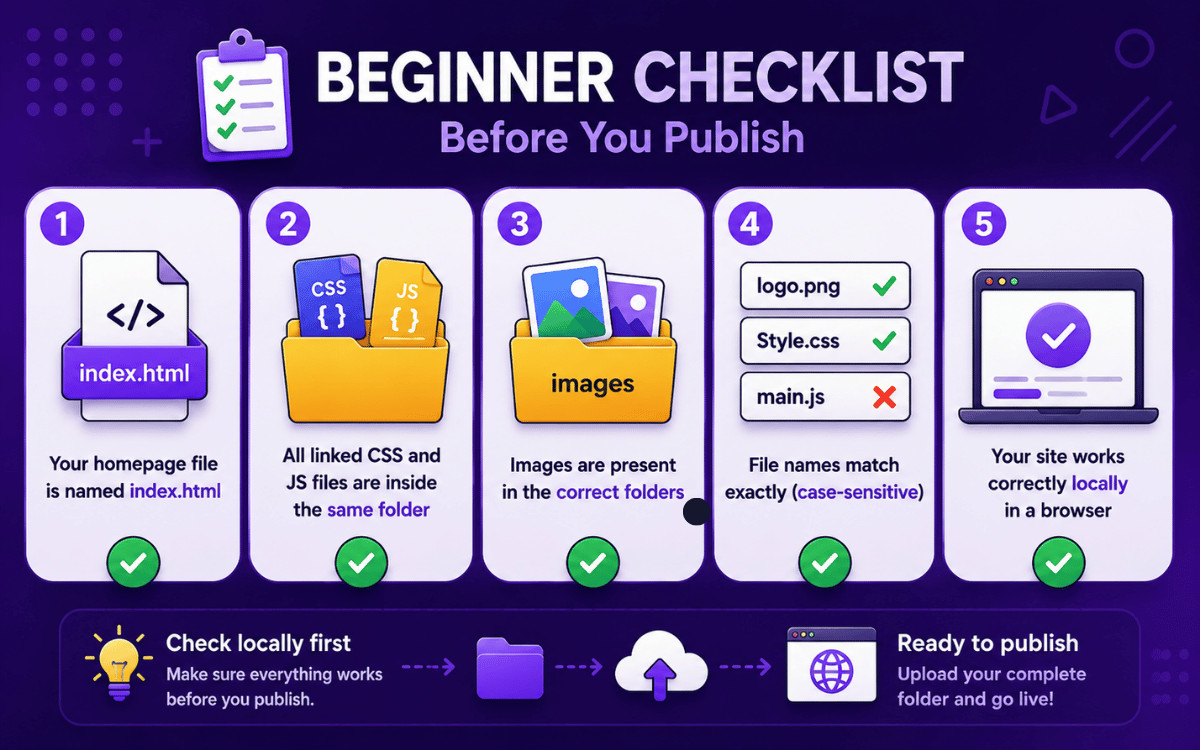
A good beginner checklist looks like this:
• Your homepage file is named index.html • All linked CSS and JS files are inside the same project folder • Images are present in the correct folders • File names match exactly, including uppercase and lowercase letters • Your site works correctly when opened locally in a browser
It is also important to check your file paths. For example, if your HTML file points to images/logo.png, that image must actually exist in an images folder inside your project. In practice, this is one of the most common reasons a site looks broken right after deployment even though the upload itself worked.
This is one reason many beginners feel confused after deployment, even when the upload itself looks successful. The problem is often not the publishing step itself. It is the folder structure.
When a plain HTML site is enough
If your site mainly shows content, images, buttons, or contact details, plain HTML hosting is usually enough. It works well for portfolios, landing pages, event pages, documentation, and simple business websites. You only need a more advanced setup if your site requires a database, user accounts, or server side logic.
Simple ways to publish an HTML website
Method one: publish with Netlify
Netlify is one of the easiest options for beginners because you can publish a static HTML site by dragging your project folder into the deploy area. If your files are zipped, unzip them first and upload the actual project folder. For many first time users, this is the fastest way to move from a local folder to a live URL.
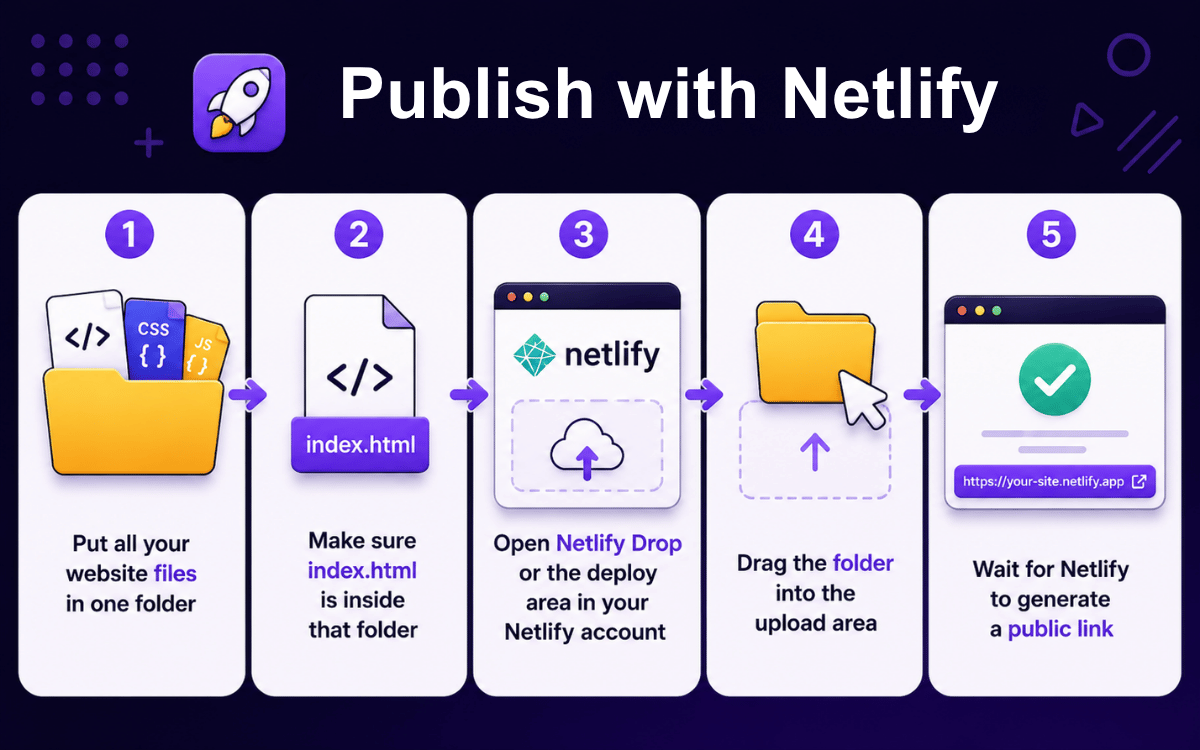
The simplest workflow looks like this:
• Put all your website files in one folder • Make sure index.html is inside that folder • Open Netlify Drop or the deploy area in your Netlify account • Drag the folder into the upload area • Wait for Netlify to generate a public link
This is one of the simplest options if you do not want to deal with Git, terminal commands, or server setup. You prepare the folder once, upload it, and the site goes live.
There is one important detail to get right. A very common beginner mistake is uploading the wrong folder level. If index.html is not in the root directory, the deploy may finish successfully but the homepage still will not load correctly. In other words, the file must be in the main project folder, not buried inside another nested folder unless you intentionally deploy that inner folder.
Netlify is a strong choice for readers who want:
• A beginner friendly interface • A quick drag and drop workflow • A free way to test or launch a static HTML site • An easy public URL without manual server configuration
If your main goal is speed and simplicity, this is often the most direct path.
Method two: publish with GitHub Pages
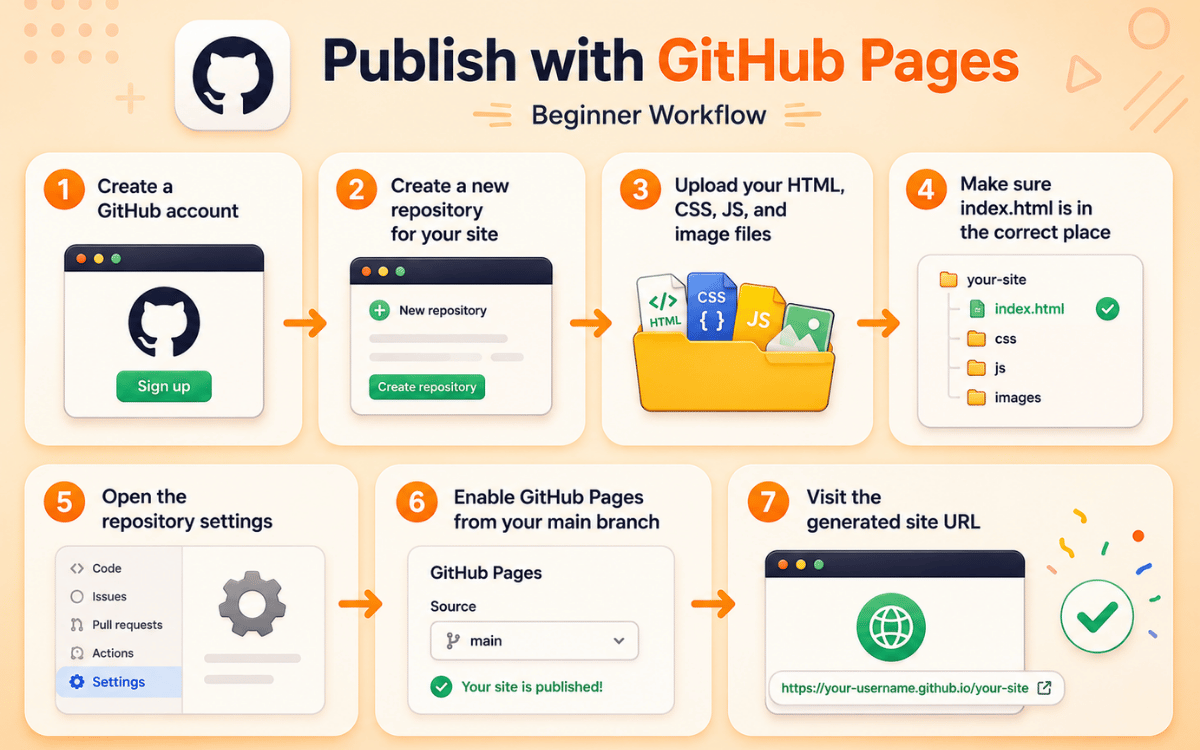
GitHub Pages is a good option if you want free hosting and prefer to manage your site through a repository. To publish, upload your files to a repository, enable GitHub Pages in Settings, and open the generated site URL. In practice, this option feels slower at first than drag and drop hosting, but it becomes easier to manage once you start updating the site regularly.
A beginner version of the process looks like this:
• Create a GitHub account • Create a new repository for your site • Upload your HTML, CSS, JS, and image files • Make sure index.html is in the correct place • Open the repository settings • Enable GitHub Pages from your main branch • Visit the generated site URL
This method is especially useful if you want to keep improving your site over time. Every change can be uploaded to the same repository, and your website updates through that workflow. It also gives you a cleaner long term setup if you are learning web development and want to keep your files organized.
GitHub Pages tends to suit readers who want:
• A free publishing option • A more developer friendly workflow • Version control for site files • A public portfolio or project site
If you want a free and reliable way to publish an HTML website, GitHub Pages is one of the strongest options. The tradeoff is that it feels a little less beginner friendly than simple drag and drop hosting if you have never used GitHub before.
Method three: publish with HTML Deployer
If your HTML page was created with ChatGPT, Claude, or Gemini, or you simply want a faster path from generated code to a live site, HTML Deployer by Backrun is another practical method to include. HTML Deployer as a Chrome extension that detects HTML in supported AI chats, lets you preview the page, and then publishes it to targets such as Netlify, GitHub Pages, FTP hosting, or your own server. Backrun also says the tool supports ZIP export for manual upload if you prefer that route instead.
The basic flow is straightforward:
• Generate or prepare your HTML • Open HTML Deployer • Preview the page before publishing • Choose a publish target such as Netlify, GitHub Pages, FTP, or your own server • Click deploy and get the live URL
This option is useful if you already have working HTML and want to speed up the publishing process. In practice, it is most helpful when you want to preview the page first and avoid handling every deployment step manually.
Taken together, these three methods cover most beginner needs. Netlify is the easiest for drag and drop publishing. GitHub Pages is strong for free hosting and version control. HTML Deployer is a modern shortcut for users who already have HTML and want a faster route to deployment.
Step by step checklist to publish your HTML site correctly
Prepare your folder before upload
Before uploading, make sure your project folder is complete and correctly organized.
Your folder should include the homepage file, usually named index.html, along with every file the page depends on, such as CSS, JavaScript, images, icons, and fonts. Netlify’s current documentation specifically says your project folder should contain an index.html file at the root level when you deploy with Netlify Drop.
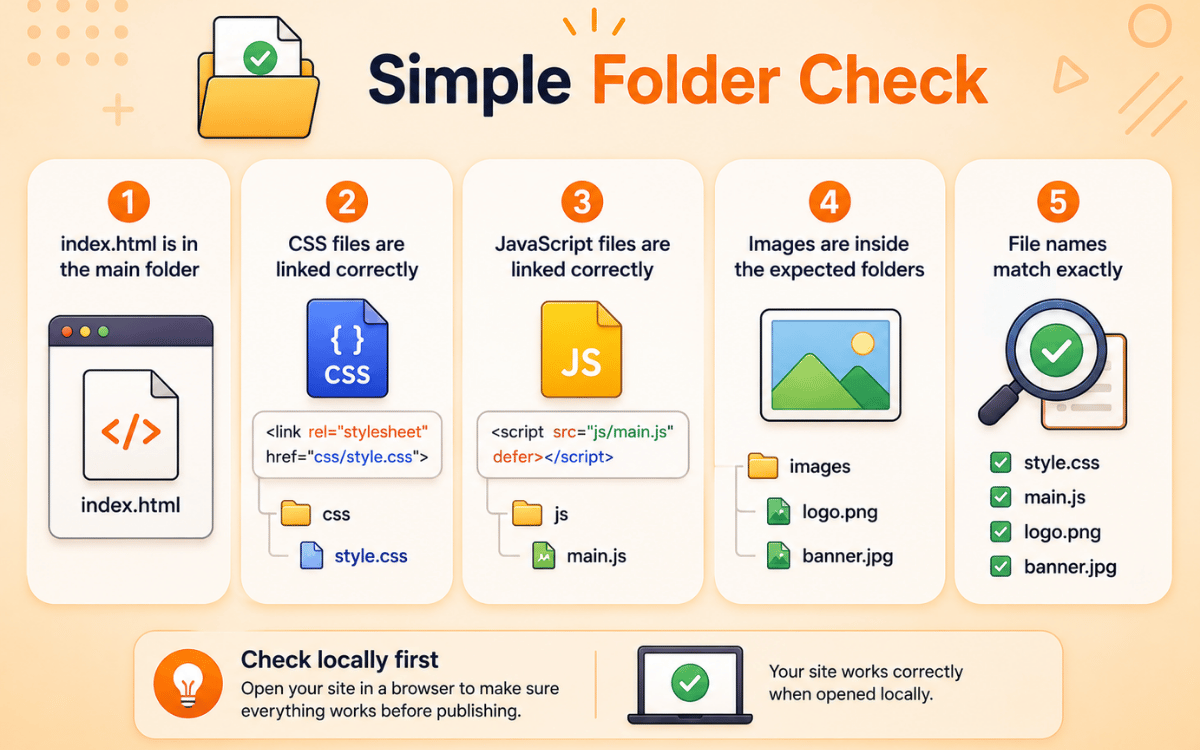
A simple folder check looks like this:
• index.html is in the main folder • CSS files are linked correctly • JavaScript files are linked correctly • Images are inside the expected folders • File names match exactly • The page opens correctly on your computer before upload.
Make sure index.html is in the main project folder, not inside the wrong parent folder. Before uploading, open the site locally and test the main pages, images, buttons, and styles. If something is broken locally, it will still be broken after deployment.
Upload files and get a live link
Once your folder is ready, upload it to a hosting platform and get your public URL.
If you use Netlify, the simplest path is to drag your project folder into Netlify Drop. Netlify says you can create a new site by dragging a folder that contains your site files, and then access the published site at a preview URL ending in netlify.app.
If you use GitHub Pages, the process is slightly different. GitHub’s documentation says you can publish a Pages site from a specific branch and choose either the repository root or a /docs folder as the publishing source. GitHub also provides a quickstart that uses a repository named username.github.io for a user site.
So the universal process is:
• Choose a hosting method • Upload your project files • Make sure the publishing source points to the correct folder • Wait for deployment to finish • Open the generated public URL
If you are using a tool based workflow such as HTML Deployer, the same idea still applies. Backrun says HTML Deployer can detect HTML, preview it, and publish it to targets such as Netlify, GitHub Pages, FTP hosting, or your own server. That can reduce the number of manual steps if your HTML already exists and you want a faster deployment flow.
For beginners, this is the key idea to understand. Your HTML file becomes a real website only after the hosting platform serves it from a public web address.
Test your website after publishing
After publishing, test the live site to make sure everything works correctly.
As soon as your public URL is ready, open it in a browser and check the homepage first. Make sure the page loads, the layout appears correctly, and the main content is visible. Then test the rest of the site.
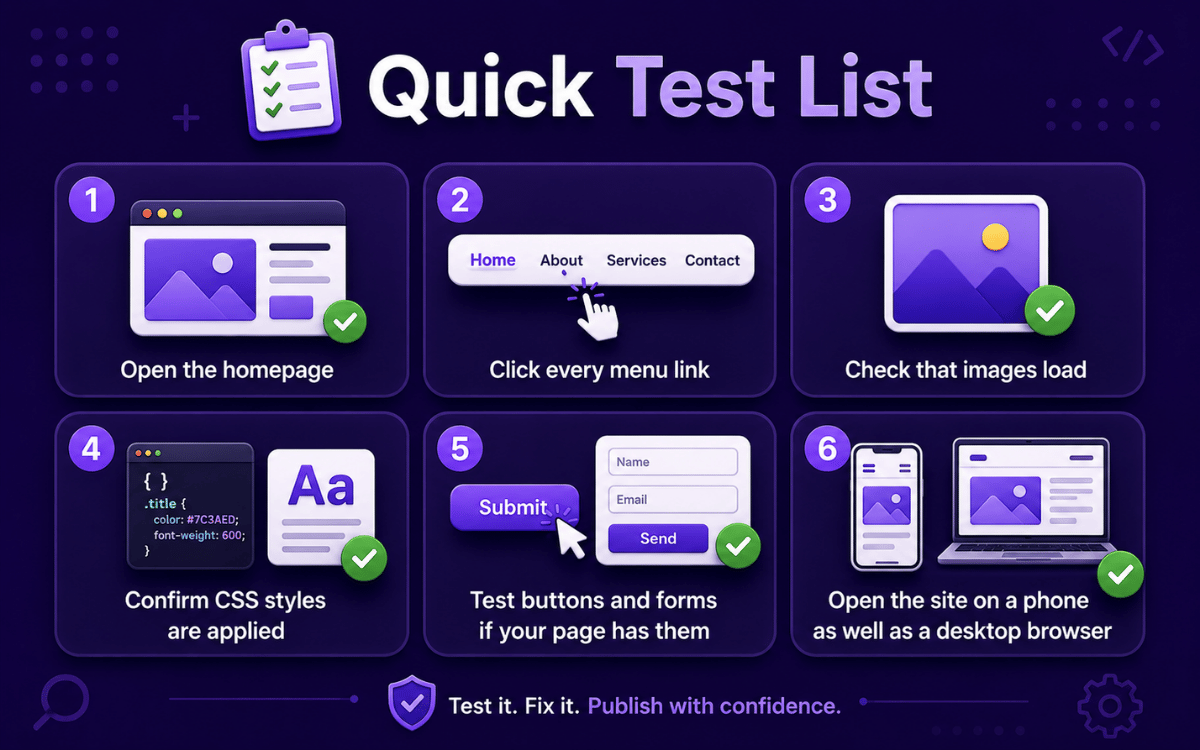
Use this quick test list:
• Open the homepage • Click every menu link • Check that images load • Confirm CSS styles are applied • Test buttons and forms if your page has them • Open the site on a phone as well as a desktop browser
If the page loads but looks unstyled, your CSS path may be wrong. If images are missing, the image folder path may be incorrect. If the homepage does not open at all, check whether index.html is in the expected location. Netlify’s documentation explicitly highlights the root level index.html requirement for this reason.
If you publish with GitHub Pages and nothing appears, verify that the correct branch and folder are selected as the publishing source. GitHub’s documentation explains that the source can be the repository root or a /docs folder, so choosing the wrong one can stop the site from showing your actual files.
Common issues when publishing an HTML website
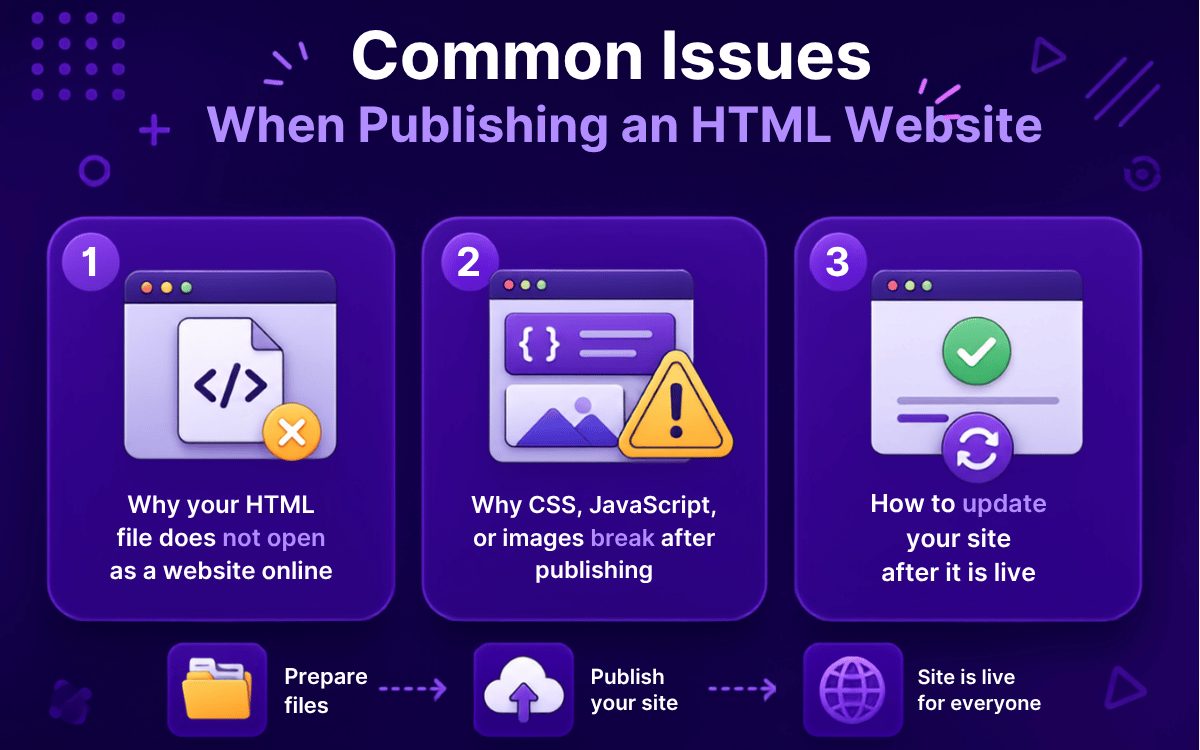
Why your HTML file does not open as a website online
One of the most common problems is that the website seems uploaded, but the live link does not show the page you expected. In many cases, the issue is not the platform itself. It is the structure of the uploaded folder.
For example, Netlify’s setup guidance says your project folder should contain an index.html file at the root level. If that file is missing, or if it sits inside the wrong folder, Netlify may deploy the files but still fail to show the homepage correctly. Netlify also notes that larger files or unstable network connections can interfere with upload success, which is another reason a deploy may appear incomplete.
GitHub Pages can also fail to show the correct site if the publishing source is configured incorrectly. GitHub’s documentation explains that you must choose an existing branch as the publishing source and then select the correct folder location, typically the repository root or the /docs folder. If your HTML files are in one place but GitHub Pages is pointed somewhere else, the live URL may not show your actual site.
In many cases, the problem is simple: the wrong folder was uploaded, or index.html is not in the expected location.
A quick fix checklist is:
• Make sure the homepage file is named index.html • Confirm index.html is in the correct folder level • Verify you uploaded the actual project folder, not a parent folder • Check that your hosting platform is pointing to the right source folder • Reopen the live URL after the deploy finishes completely
Why CSS, JavaScript, or images break after publishing
Another common issue is that the page opens but looks broken. In most cases, this happens because of incorrect file paths rather than a hosting problem.
If your HTML file links to a stylesheet, image, or script using the wrong relative path, the browser cannot find that asset after publishing. This often happens when files are moved into new folders or when the uploaded folder structure is different from what the HTML expects. MDN’s publishing guidance emphasizes preparing your site files and hosting structure correctly before putting the site online, which matches this real world problem for beginners.
Another common issue is file name mismatch. A file called Logo.png is not the same as logo.png on many web hosting environments. A site may appear to work locally on one machine and then break online because the host treats uppercase and lowercase names differently. This is one reason it helps to keep filenames simple and consistent.
Use this troubleshooting approach:
• Open the published page and inspect what is missing • Check whether the file path in the HTML matches the real folder structure • Make sure image, CSS, and JS filenames match exactly • Avoid local machine paths inside HTML such as files saved from your own computer path • Reupload and test again after fixing the links
This is an important lesson for anyone publishing a simple HTML site. A live link alone does not guarantee the site is correctly connected to all of its assets.
How to update your site after it is live
To update your site, edit your local HTML, CSS, or JavaScript files, deploy again with the same platform, then refresh the live URL to confirm the changes appear.
How to choose the right way to publish your HTML website
Best choice for complete beginners
Choose Netlify if you want the fastest beginner friendly setup. It works well when you already have a project folder and want a live URL without learning Git or configuring a server.
Best choice for free publishing
Choose GitHub Pages if you want free hosting and prefer to manage your site through a repository. It is a good fit if you plan to keep updating the site over time.
Best choice if your HTML was created with AI tools
Choose HTML Deployer if your HTML was generated by AI and you want a faster way to preview and publish it without handling every deployment step manually.
Final takeaway
Choose Netlify for the fastest beginner friendly setup, GitHub Pages for free repository based hosting, and HTML Deployer if you want a quicker workflow for AI generated HTML. The best option is simply the one that matches your skill level and helps you get the site live with the least friction.